Before you start
- Your shop name exactly as customers know it.
- The email address that should receive a copy of every order.
- A logo image (PNG or JPG). A wide logo looks best in the page header.
Step by step
-
Open Basic Info
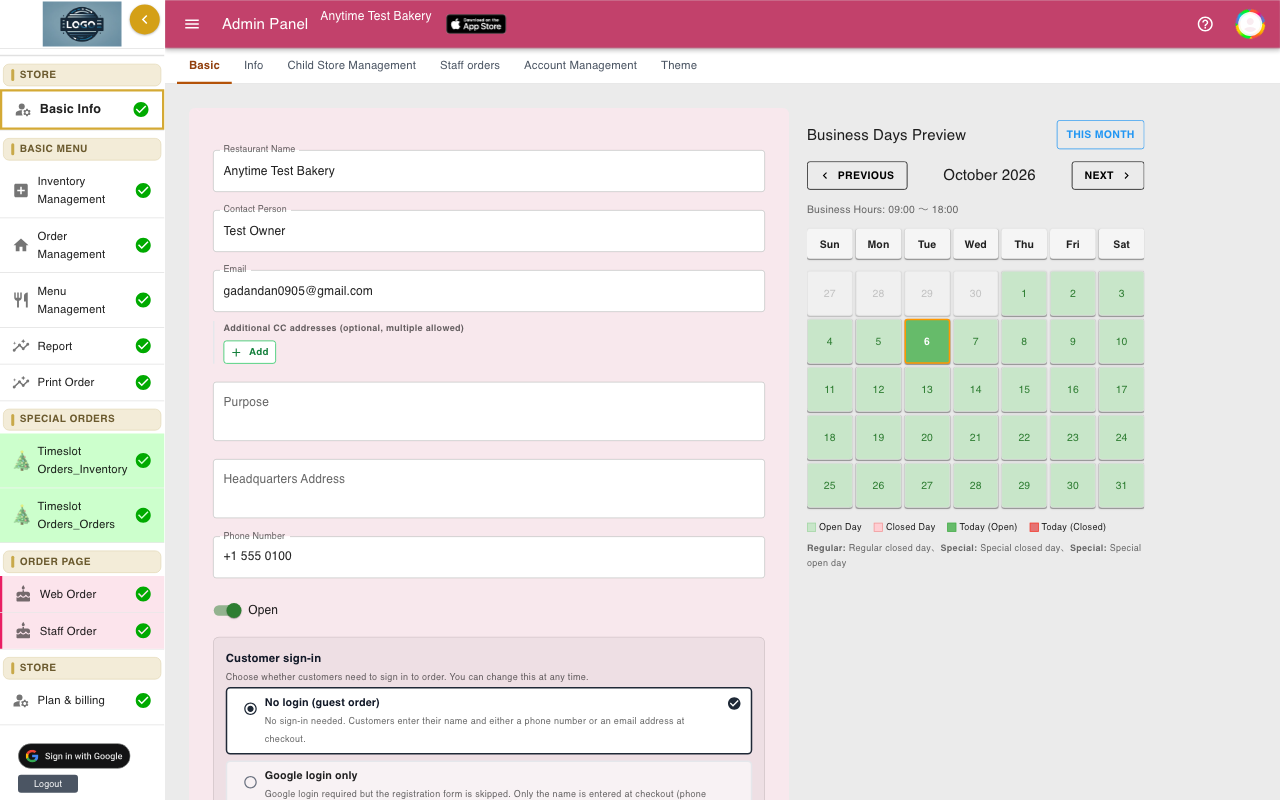
Click Basic Info in the STORE group of the left menu. The page has tabs across the top: Basic, Info, Child Store Management, Staff orders, Account Management and Theme (In Development).
Stay on the Basic tab for the next steps.
-
Enter your shop name and contact details
Fill in Restaurant Name with your shop name. Customers see it on your order page when you have no logo, and in their emails. Add Contact Person, Email and Phone Number.
Your Email and Phone Number are printed in every order confirmation email, so customers can reach you. Purpose and Headquarters Address are for your records and are not shown to customers.
-
Send order copies to more people
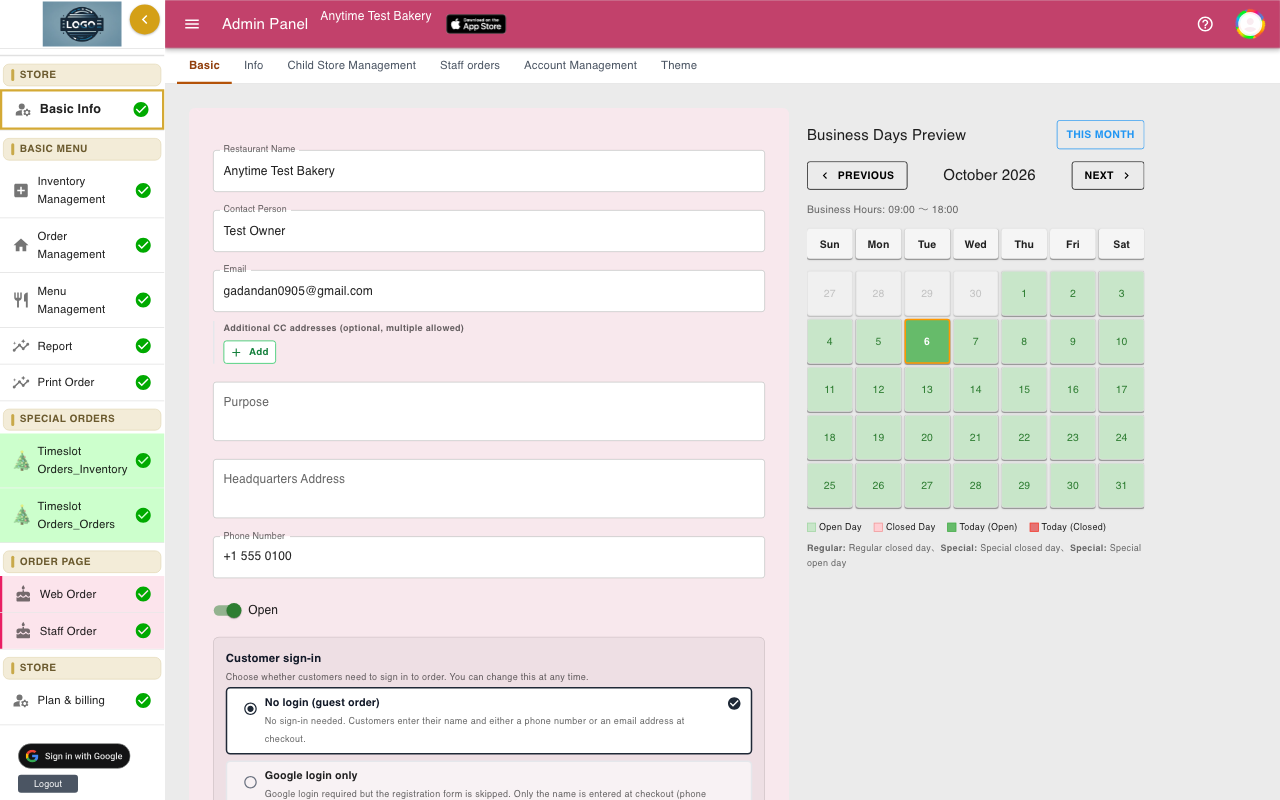
Every order email is copied to your Email address. To copy it to the kitchen or a manager too, find Additional CC addresses (optional, multiple allowed) and click Add.
Type the address, click Save, and repeat for each person. You will see You have unsaved changes until you click Update at the bottom of the page.
-
Upload your logo
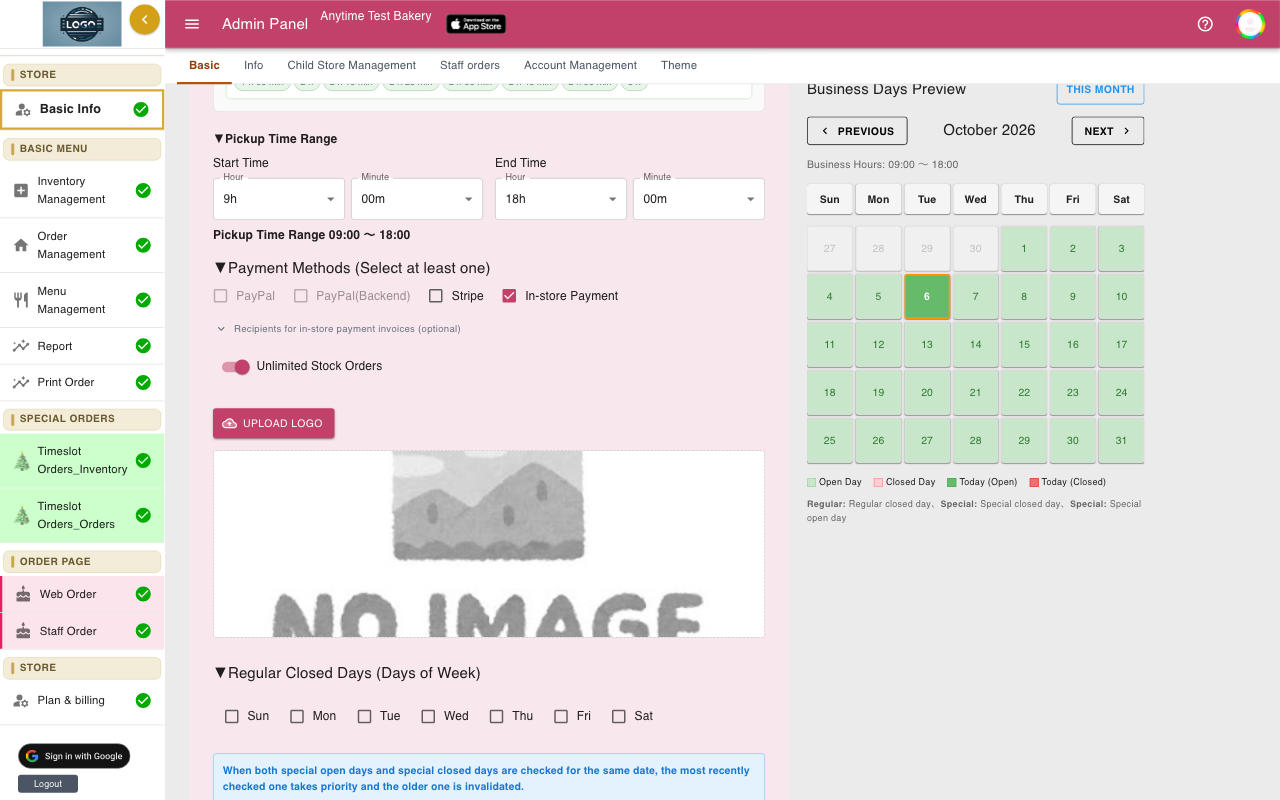
Scroll down to Upload Logo and choose your image. A preview appears right away.
The logo is not saved until you click Update. After that it shows in the header of your order page.
-
Save with Update
Click Update at the bottom of the Basic tab. You will see Data submission completed! when it is saved.
If you see Please select at least one payment method., make sure In-store Payment is ticked under Payment Methods. Customers always pay you at pickup.
-
Write the Info box for your order page
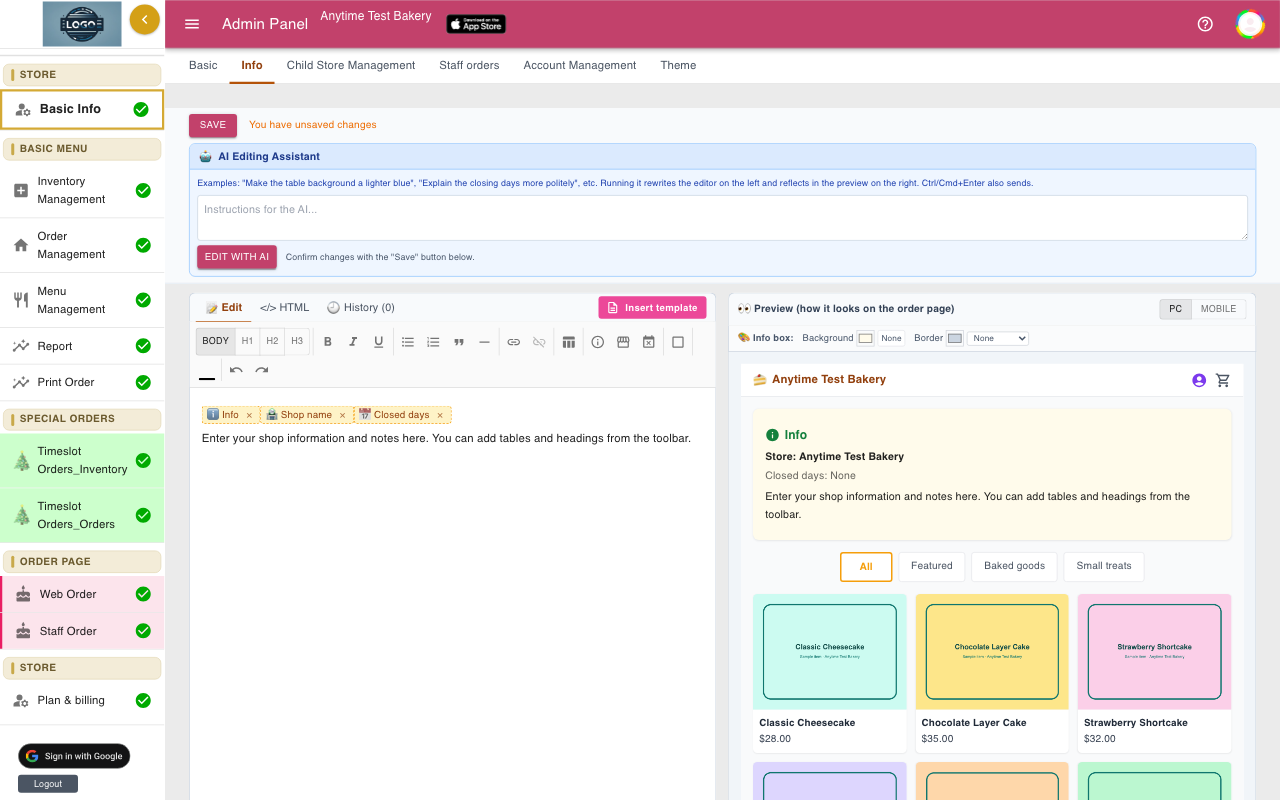
Open the Info tab. What you write here appears in a box at the top of your order page, so use it for your welcome message, how to find you, and holiday notices.
Click Insert template for a ready-made layout, or type your own. Buttons on the toolbar insert your shop name and closed days automatically. Check the preview on the right, then click Save.
-
Restore an earlier version of the Info box
The History tab inside the Info editor keeps your last 10 versions. Pick one and click Restore this version.
Restoring only fills the editor. Click Save to put it on your order page.
-
Give your staff their own sign-in
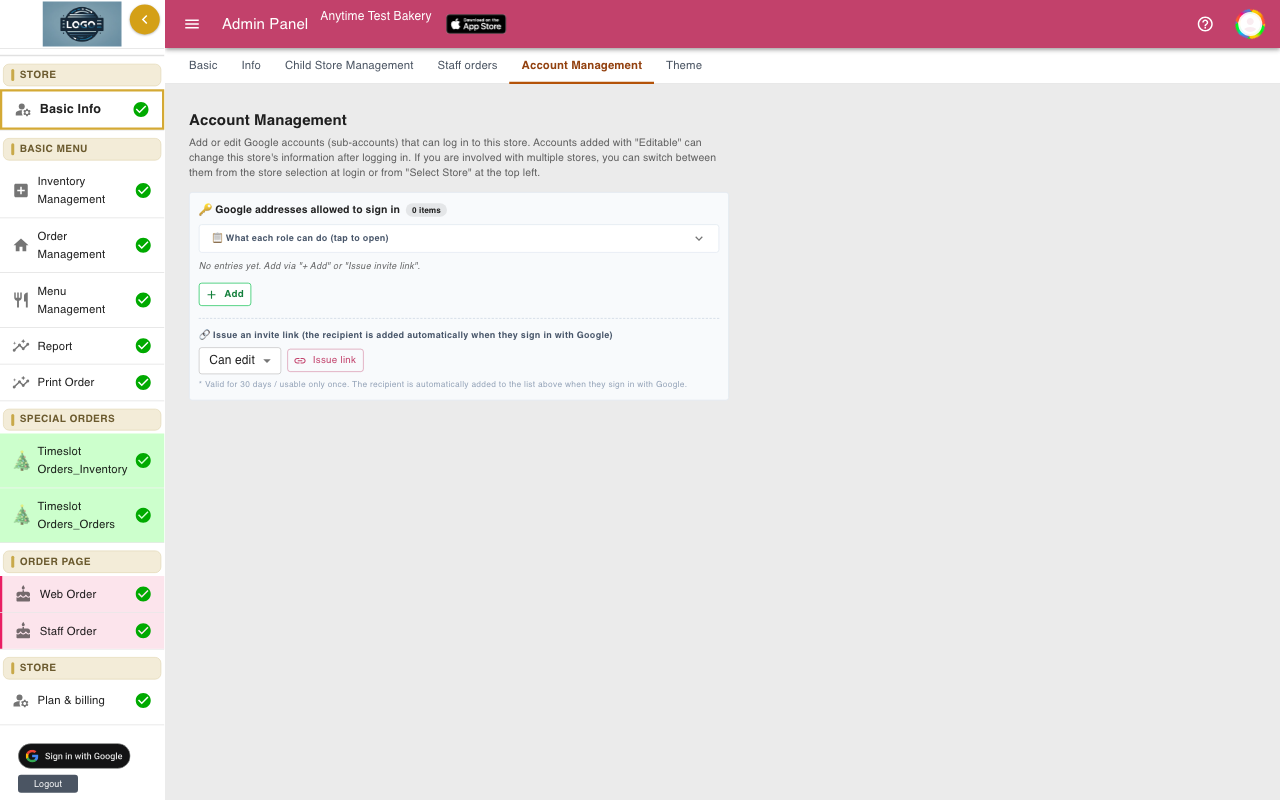
Open the Account Management tab and click Add. Enter the person's Google address, choose a role, and click Save. These changes save right away, with no Update button.
Admin can do everything except billing. Can edit can change products, stock and settings. View only can see orders and print, but cannot change anything.
-
Or send an invite link
Under Issue an invite link, choose a role and click Issue link, then Copy. Send the link to your staff member.
When they open it and sign in with Google, they are added automatically. Each link works once and is valid for 30 days.
Tips
- Use a shared shop email (not a personal one) for Email. Customers will reply to it.
- Write the Info box for a customer who has never been to your shop: where to park, which door, and what to bring.
- The Theme (In Development) tab is still being built. You can leave it as it is.
Questions
Where do I put my return or allergy policy?
There is no separate field for policies. Add them to the Info box so every customer sees them before ordering.
My logo disappeared after I left the page.
The logo is uploaded straight away but only saved to your shop when you click Update. Upload it again and click Update.
What do the payment method boxes do?
Customers always pay you at pickup. Keep In-store Payment ticked, because at least one box must be ticked to save.
I have more than one location. What do I do?
Use the Child Store Management tab to add a store under your main shop. Each store gets its own order page link, products and settings.
Who can change billing?
Only the owner (the Google account that created the shop) can manage billing.
Related guides
Still stuck? Email us at support-global@cakesystem.net.